Capybaras VS Plants Plot Layout Guide
Egg slots, battle lanes, totem auras, and fuse or boss space — organize your plot for income and clarity.
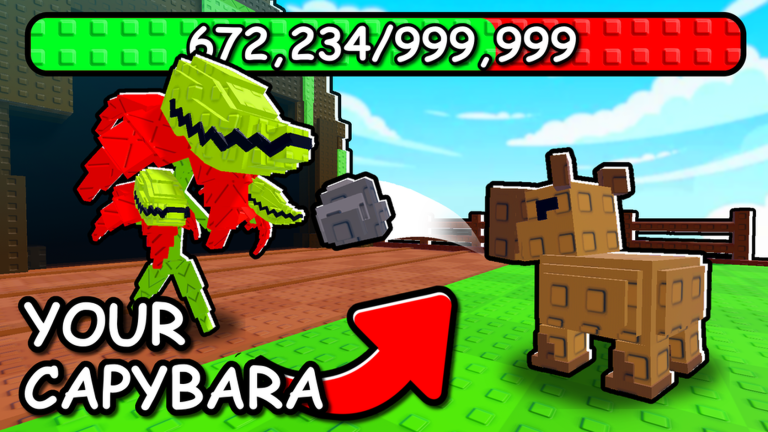
Your plot in Capybaras VS Plants is more than decoration. Scarlett the Dog Group built an idle tycoon where egg placement, battle lane facing, and totem positioning directly affect how fast you hatch, how much Cash plants drop, and how cleanly you manage Update 2 systems like the Fuse Machine and New Boss. A messy layout slows every session; a deliberate one makes How to Play fundamentals feel effortless.
This guide covers layout from first-hour placement through endgame organization. Pair it with Offline Earnings before your next logout and Controls if camera movement feels awkward on your device.
Know your plot zones
Every personal plot divides into functional areas even when the game does not label them:
- Egg slots — ground tiles where eggs incubate and capybaras appear after hatches
- Battle lanes — paths capybaras walk to attack plant waves
- Structure zone — tree, Fuse Machine, boss summon point, and totem pedestals
- Visitor path — edges other players see when they walk your plot
Walk the full perimeter once after joining. Note which direction plants spawn from and where your capybaras naturally queue. That facing matters more than symmetry for income.
Egg slot placement
Eggs must sit on valid plot tiles with visible timer bars. Good egg layout follows three rules:
Cluster hatching slots near your usual camera angle. On PC you often look from one corner; on mobile you pinch-zoom from center. Place active timers where you can tap hammers without rotating 180 degrees every hatch.
Keep at least one slot free for incoming code eggs. The RELEASE Ghost Capybara Egg from Codes Hub needs a tile the moment you redeem. Blocking every slot with long timers means manual shuffling before placement.
Separate showcase eggs from production eggs. Weather-mutation hunting during Weather Mutations works best when experimental eggs sit visible during events while your bread-and-butter timers run in a consistent row.
Parallel hatches beat one ultra-rare egg — see Hatch Eggs for timer math. Layout should support three simultaneous timers early game, scaling to more as Cash income grows per Best Cash Method.
Battle lane facing and fill
Plant battles generate Cash online and offline only when capybaras occupy battle lanes. Empty lanes earn nothing while you sleep.
Face lanes toward plant spawn direction. Capybaras path automatically, but crowded egg clusters between hatch points and lanes add visual clutter and slow manual assignment on mobile.
Fill every lane before logout. This is the single highest-impact layout habit for Offline Earnings. Players who leave two lanes empty lose roughly two-thirds of potential passive income even with strong capybaras in the remaining slot.
Put highest DPS capybaras in lane, not flex pieces. A mutated showcase belongs on your tree or near the visitor path if stats are lower than your grind units. Check Capybara Tier List when unsure which hatch stays in battle.
After Update 2, avoid leaving duplicate fodder capybaras in lanes when fusion-ready units exist — fodder belongs near the Fuse Machine mentally even if the game allows any assignment.
Totem aura positioning
Promo codes grant three income-critical totems:
| Totem | Source code | Layout role |
|---|---|---|
| Totem of Stars | 10KFAVS | Near egg cluster during hatch and weather windows |
| Totem of Wealth | UPDATE2 | Adjacent to primary battle lane for online and offline Cash |
| Totem of Fortune | UPDATE2 | Near eggs or boss prep area for luck-based rolls |
Full item context lives on Totems. Placement rules in Capybaras VS Plants use aura radius around plot structures — exact tile counts may shift in hotfixes, but the principle stays constant: Wealth touches income, Stars touches hatches, Fortune touches gamble moments.
Do not stack all three on one corner if your eggs sit opposite your battle lane. Split auras so each system you care about during a session gets coverage. Before weather events, move Stars totem emphasis toward exposed eggs; before overnight logout, prioritize Wealth at battle lanes.
Tree, fuse, and boss space
The central tree grows with Cash investment and rare plant drops — see Grow Your Tree. Keep tree approaches clear so you can interact without walking through egg timers. Tree level gates shop refreshes; treat it as a permanent structure, not a movable decoration.
Fuse Machine from Update 2 consumes duplicate capybaras. Mentally reserve a path from battle lane reassignment to fusion UI so you do not sell fodder by accident. Read Fuse Machine before sacrificing limited units like Ghost backups.
New Boss summon structures need quick access when you run timed attempts. Place mentally noted rally points: strongest capybaras in lanes for farming, swap to boss-optimized lineup before summon. Boss loot feeds fusion and tree — layout clarity reduces mis-clicks during fast attempts.
Mobile versus PC camera tips
PC / laptop: WASD or click-to-move plus mouse wheel zoom. Wider field of view suits row-based egg lines along plot edges. Lower Roblox UI scale if Shop overlap hides timer bars.
Mobile / tablet: Two-finger rotate and pinch. Keep egg timers in thumb reach along bottom screen edge when camera faces default join angle. Avoid placing critical hatches behind the tree where tap targets overlap.
Shared tip: After rejoining post-update, walk the plot once. Session desync sometimes resets assignments — verify lanes still hold fighters before assuming layout failure.
Common layout mistakes
Blocking battle paths with decorative positioning. Eggs placed between hatch zone and lanes slow every manual assignment.
Single-lane logout. One capybara fighting while three eggs hatch wastes parallel income potential.
Totems in inventory. Codes from Codes Hub mean nothing until equipped on plot — Wealth unused during offline blocks is lost multiplier time.
Fusing from battle lane. Pull duplicates to fusion consciously; do not delete your only Ghost copy because it sat in a lane you cleared for DPS.
Ignoring weather side of plot. Eggs hidden behind structures miss mutation exposure during events — keep at least one experimental slot open to sky/weather direction per Weather Mutations.
Copying streamer layouts blindly. Plots vary slightly by instance; adapt principles (lane fill, totem coverage, egg clusters) to your camera habit, not someone else’s aesthetic.
Layout checklist by progression stage
First hour: One egg row, one filled battle lane minimum, redeem codes before placing RELEASE egg.
Mid-game: Three parallel timers, full lanes, Wealth totem at income side, Stars near eggs during events.
Post–Update 2: Fuse path mentally mapped, boss rally lane identified, fodder duplicates not in primary DPS slots.
Related guides
- How to Play — core loop before optimizing layout
- Offline Earnings — lane fill at logout
- Totems — aura items from promo codes
- Fuse Machine — duplicate placement discipline
- Codes Hub — free totems and Ghost egg
- Capybara Tier List — which units stay in lane
- Best Cash Method — income priorities
- Controls — camera and placement inputs
Frequently Asked Questions
Quick answers for Capybaras VS Plants players.
Does plot layout affect Cash income?
Indirectly yes. Full battle lanes, correct totem placement, and efficient egg access maximize online and offline earnings even though plant spawn locations are fixed per plot.
Where should I place Totem of Wealth?
Near your primary battle lane where capybaras fight plants. Wealth boosts income multipliers that apply during active farming and offline simulation.
How many egg slots should I use at once?
Run as many parallel timers as you can afford early game — usually two or three Cash eggs before your first long offline block.
Can I move the Fuse Machine or tree?
These are fixed plot structures after unlock. Plan walking paths around them rather than expecting relocation.
What is the biggest layout mistake for offline income?
Logging out with empty battle lanes. Fill every slot with your highest-stat capybaras and equip Wealth totem before closing the game.